 I am not a photographer. I'm barely able to shoot manually with my DSLR and am still more comfortable snapping away on auto.
But there are lots of things you can do to help your pictures look better, even with your point-and-shoot.
The first rule about restaurant photography is to have no fear and be confident. I am shameless, as any of you who have dined with me can attest.
 To me, two things are most important -- lighting and a steady hand. If you have these two things, you're almost guaranteed a good shot.
What do you do in a dark restaurant, though?
This troubles me all the time. From more experienced photographers, I've learned that cranking up your ISO helps a lot, but a high ISO can result in a lot of noise in the picture, which is not so great either. I've also learned that the right lens is key, although I haven't invested in one yet.
 Erin gave me these suggestions:
(a) Get a 50mm f/1.8 or f/1.4 lens.
(b) Use ISO 400 or 800 if it's really dark, even ISO 1600 is better than not getting the shot at all.
(c) Keep the camera on Av mode on the largest possible aperture (f/1.8 or f/1.4 on the 50mm, f/3.5 on the kit lens).
(d) Take a few shots in a row on "continuous" mode so that one is hopefully clear.
This is all well and good if you speak photography, but, if that made no sense to you, allow me to share my very primitive tips that you can apply to both your DSLR on auto and your point-and-shoot.
(1) When you arrive at your table, grab the seat that has the most light. If the whole table is in darkness, ask for another table. Crazy? Maybe. Good for pictures? Definitely. Natural light is best. For this reason, I really love shooting breakfast, brunch, and lunch. These are your best chances to practice if you are still nervous about shooting poorly lit dinners.
(2) If the restaurant is really dark, and you have a candle on your table, move the candle next to the food you want to photograph. Again, this may sound odd, but it makes a really big difference. Try to move the candle to the side or to the front of your subject, or else your food will simply be a backlit shadow.
(3) Out of simple courtesy, take pictures of your willing companions' meals first. Snap quickly and let them enjoy their food while you take your time with your own dishes. If you look carefully, you will notice that the photos of my own food usually look better than the ones I take of others' food. This tip doesn't really improve your photos, but it does improve the quality of your companions' dining experience!
(4) If you are really ballsy, use a tripod. I have a little Gorillapod for my point-and-shoot, which is perfect for keeping your camera absolutely still. This goes back to the importance of a steady hand -- nothing's steadier than a tripod! Admittedly, if I pulled out a tripod for my DSLR at a restaurant, I think my ever-understanding Mr. Monkey might reconsider our relationship. We'll see when I actually get a Gorillapod for my DSLR.
(5) Capture your food from different angles. Don't be afraid to rotate your dish. This way you will have a variety of pictures from which to choose.
(6) Do your best to focus on just one portion of your dish. My favorite shots are ones in which the main part of an entree is sharp, and everything else in the background is blurred. When you are using your DSLR in auto mode or using a point-and-shoot, this effect is best achieved by shooting on your digital "macro" or "close-up" preset. The logo for this is usually a little flower. Use it!
(7) Even when it goes against logic, shoot without your flash. The flash on your camera is rather harsh on its own, and your photos will be warmer without it. I almost never use my flash, even in the dimmest settings.
(8) When all else fails, cheat and tweak. If you have Photoshop, use it to your heart's content. I am a cheap-ass amateur who doesn't even have Photoshop, so I just tinker with the basic free features on Picnik, which you can access through Flickr. With my really dark restaurant photos, I tend to increase the exposure and contrast a bit. Sometimes I have fun with other features, too, but I generally like to keep things natural-looking, at least when it comes to food.
Good luck, and happy food blogging!

i loved this post; very educational. ;-)
ReplyDeleteThese are fabulous tips! If I may, I'd also add that holding your breath while pressing the shutter will help with camera shake, and so will keeping your arms as close to your body as possible at all times.
ReplyDeleteDon't ever tell anyone you're not a photographer. Anyone who owns and enjoys using a camera is a photographer! I hang with a lot of pros who don't have the passion you do, auto mode or not!
I admire your ability to "shoot from the hip", despite what other patrons or onlookers may think. I struggle with taking photos in restaurants all the time because I simply won't be bothered with the random looks I get from the employees or folks sitting at the next table over.
My only tip to you is invest in a fast macro lens, probably 50mm or 85mm. Not only are they great for food close ups, but they're also useful for portraits and bokeh. Zoom lenses are more versatile, but they make it harder for the user to learn good distance to subject (to increase apparent sharpness) and they have a much harder time focusing because of the slight movement the lens makes even when you think you're set on a specific focal length.
Great tips! I would add one more-- if you are in a restaurant with little natural light and strong fluorescent or incandescent light, adjust the white balance. If your photos look really yellow or blue, your white balance is off.
ReplyDeletegreat post!
ReplyDeletei wholeheartedly agree with you on #3...i don't know how many times i've gotten the evil eye from my hubby or friends because they're starving and here i am trying to snap away @ their food.
btw, i love, love, LOVE my 50mm 1.8f lens. it's pretty inexpensive too...i think you can get one for close to $100. get one now if you haven't already!
These are great tips! I'm sure this will be so helpful to many restaurant bloggers.
ReplyDeleteI have definitely moved seats because of the lighting and done the little trick with the candle :) I agree wholeheartedly with #3, especially if you want those same people to come out with you again! I have yet to bust out my tripod at a restaurant... I think that might be going too far, even for me :)
don't hold breath when clicking the shutter.
ReplyDeleteinhale and let air out slowly .. you won't shake.
I'd use a tripod & let the camera's 2 second timer, snap the shot
you are awesome! thanks for this post!
ReplyDeleteduly noted, wise one.
ReplyDeletei've been tinkering with my camera trying to understand apeture. I just can't get it! thanks for the tips though.
ReplyDeleteI really think you should get a full-size tripod instead of a gorillapod for the DSLR. It's bulkier but more versatile. (though I can't imagine whipping out the tripod during dinner either)
ReplyDeleteCouldn't resist-
ReplyDeletehttp://img.dailymail.co.uk/i/pix/2007/09_01/1MeerkatSnapSWNS_468x654.jpg
i'm lucky to get food photos at all, so i guess i'll have to continue to settle for the sucky ones i do get away with.
ReplyDeleteI had lunch at BLD in LA this past weekend and 2 tables down from me was a dude with a ginormous camera taking multiple shots of his food. What was funny to me was that the tables on both sides of him at separate times asked him what they should order. One of them said, "You must be a food blogger. I'm going to order whatever you suggest." So awesome. (I immediately thought of you.)
ReplyDeleteI totally agree with Liz on the white balance issue also!
ReplyDeleteDitto all the above. I've always wondered how you take such wonderful food pics. Makes me want to lick the screen.
ReplyDeleteI will definitely put your tips to good use. I would never think of using the flower mode.
I'm going to Soowon Galbi tonight w/ my 'meat jacket' (it my jacket of choice for kbbq). Hopefully I'll be able to practice w/ my Point & Shoot.
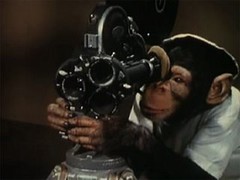
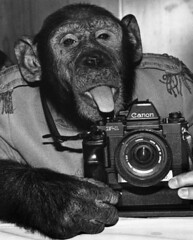
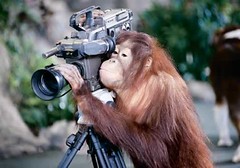
I think I love the fact that monkeys are holding cameras in your very helpful post. :)
ReplyDeleteI love that you're giving food photography tips. :)
ReplyDeleteI almost never take food photos, but I do carry my gigantic camera a lot of different places. I don't really pay attention to how others react to it. I just like to document my life.
I just got a new point and shoot and have been LOVING having a camera on me at all times. The best part? It fits in my pocket. :)
PS - Pamela is right; a 50mm lens is an awesome investment. I have the 1.8 (it's pretty cheap), and it's my absolutely favorite lens.
I must say, you look much prettier taking food pix in person than in this post ;)
ReplyDeleteThis is so much work.
ReplyDeleteI'm with FGD - I'll settle for enjoying your pictures.
ReplyDeleteThese are tips that will be used across the world for the next week! Oh, the food that awaits to be photographed. The thought gives me chills.
ReplyDeleteNever knew about free flickr tools! I can't wait to play with those!
ReplyDeleteso awesome. i love the advice about the candles. i'm going to try to find the macro option aka the flower.
ReplyDeleteThis is great! :)
ReplyDeletethese are great tips!
ReplyDeleteDefinitely great points. However, I think it's okay to use flash on certain occasions when A) even a low-light lens is going to give you bad photos and B) you're only shooting 3-4 dishes (don't recommend for 15 course tasting menu). Also, if you change your flash mode to slow, or rear (I think that's what it's called), then you'll get a less-harsh flash. Your shutter stays open even after the flash so that you can capture a bit more detail. It's worth trying.
ReplyDeleteOH, another HUGE tip that I recently learned - customize your white balance, or preset it against something that's "white" in the room. This has been a huge help for me when even the preset "tungsten" or "fluorescent" settings don't do enough to balance out the color.
ReplyDelete